I apologize for such a long break on my end. I am so sorry and I'm hoping that you don't think that I was giving you the silent treatment. I have been very busy with life!
However, I recently had spring break and I accomplished so much when I had time off, so today you get pictures instead of my clever little jabbers about my life.
First things first, Dayton and I went to St. George with my family and we had so much fun! We went on beautiful hikes and spend some much needed time together.
Here are some photos from the trip:
We obviously had our fun and when it was time to go home we were very sad.. I mean how can you leave something so beautiful as that?
When we did finally make it home I set out on a new project, re-doing my kitchen! Now this post is my first post in a series of updates about the process. One of the things that is most important to me when planning this project was keeping this process within a budget. Dayton works really hard to provide us with a really bad ass house and I wanted to keep the price tag on my hobbies reasonable so as not to stress his wallet much more than I do already. (love you honey!)
So with out further ado, here is step one in the kitchen re-do, refinishing my cabinets.
Before:
As you can tell, my house is pretty sweet! I love everything about this house but it does need a little bit of an update. By the way, the picture on the left there is my dad helping my plan out our project. He was the biggest help throughout this and i'm so glad we got to spend some time together! We had a blast and basically became experts at refinishing these cabinets. (Thanks Dad!!)
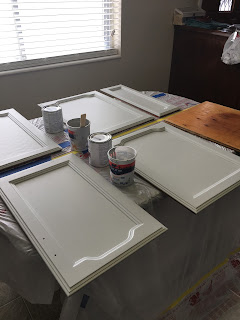
Here are some in between pictures:
Yes.. paint. Sanding? Nope, not one second of sanding. WOO HOO!
We used the product Rustoleum Cabinet Transformations to do this project and the kit requires a step of de-glossing which allows the paint to bond to the wood without sanding.
After this stage we did a glazing stage, however we didn't take picture of this process because we honestly didn't have free hands or probably because we forgot..
Ready for final-ISH pictures?
.......
TA DAH!!!
We haven't put on our new handles yet but for the most part this is the finished product!
And that budget I was talking about?
This project and all the supplies involved including the new handles cost around $300. Not too bad for a fresh new kitchen look!
Next up on the agenda for Mission: Kitchen Update?
New countertops!
Stay tuned my cute little followers!
I promise you will be hearing from me soon!
--Shlog--


Woo hoo, a new blog. Glad to see you're back at it .
ReplyDelete